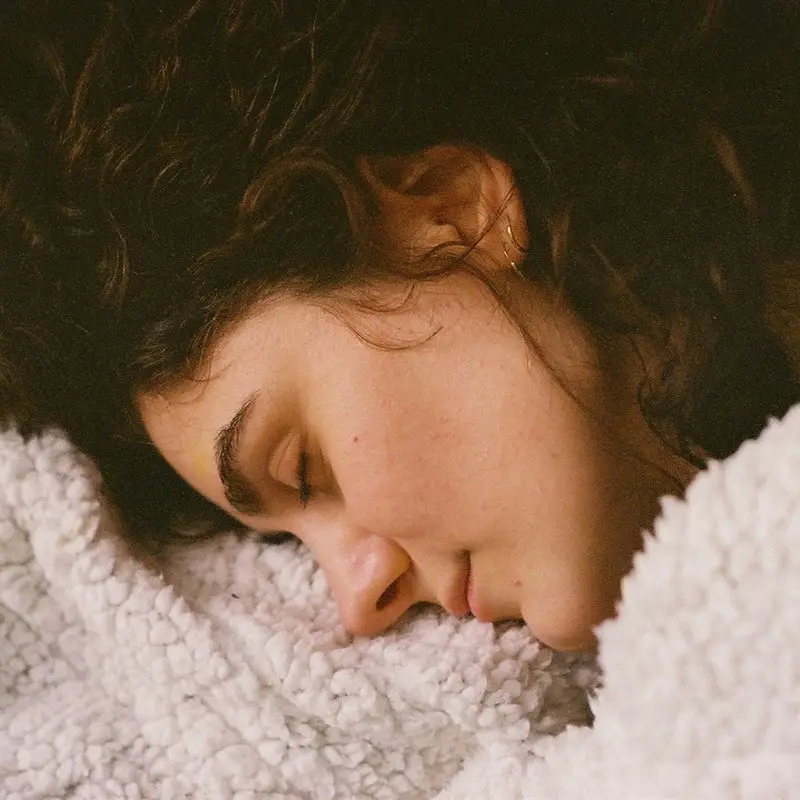
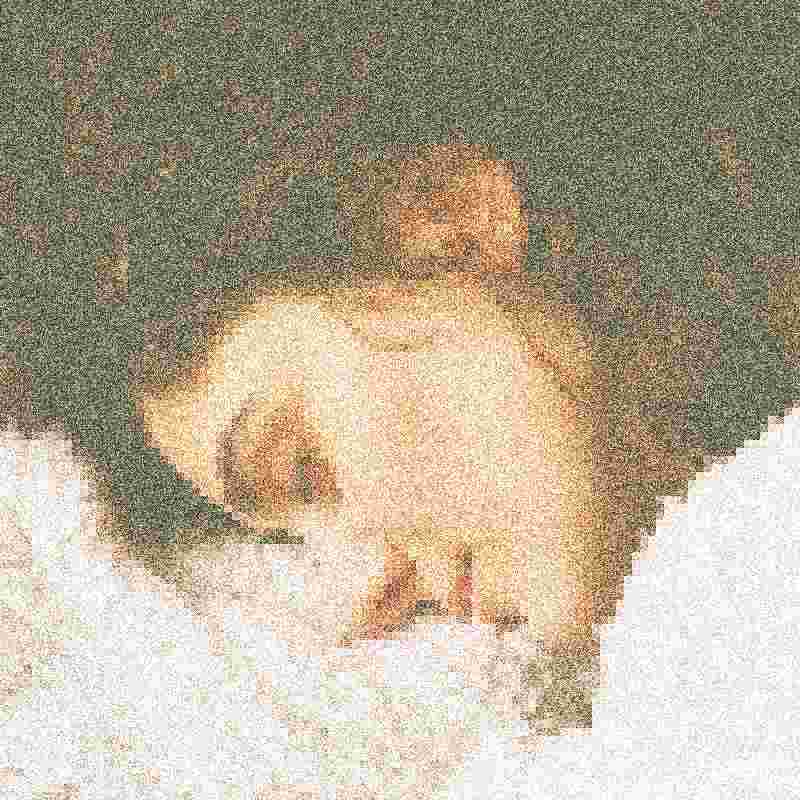
Deep fried with one click
149 KB → 38 KB · drag to compare
Low Quality Image Maker
Intentionally degrade, compress, pixelate, and deep fry any image — right in your browser. Create crusty deep fried memes for Reddit and Discord, compress high-res photos under strict file size limits for government forms and email attachments, pixelate sensitive information for privacy, or add CRT scan lines and vintage noise for that early-internet aesthetic. Supports JPEG, PNG, WebP, GIF, and BMP files up to 100MB. 100% client-side processing — your images never leave your device. No uploads, no servers, no watermarks, no signup. Completely free, unlimited, and private.
I want to...
Drop image here
or click to browse
JPEG + PNG + WebP + GIF + BMP ≤100MB
Processed preview
- → -
Why choose this tool
Instant Processing
Rendered in milliseconds using your device's GPU-accelerated Canvas API. There are zero server queues, zero upload wait times, and zero network latency. The instant you drag a file into the upload zone, processing begins. Every slider movement and preset click triggers an immediate re-render through an animation-frame-throttled pipeline so the preview updates at a smooth 60 frames per second. You see exactly what you will get before hitting download, including live file size estimates accurate to within 5% of the final output. Even a 100MB high-resolution photo renders in under 200 milliseconds on modern hardware. Unlike cloud tools that make you wait in a queue behind other users, our client-side architecture means processing is never throttled by server load— it is always as fast as your own device. No other free online image quality reducer combines instant preview feedback with large-file support at this level of performance.
100% Private
Zero bytes of your data ever leave your device. While cloud-based tools silently upload your photos to remote servers for processing, our entire degradation engine runs inside your browser using the HTML5 Canvas API, FileReader, and toBlob— all standard browser APIs that execute locally. You can verify this yourself: open your browser's Network tab while using the tool and you will see exactly zero outbound requests during image processing. Disconnect from the internet entirely and every feature still works— uploading, previewing, preset effects, advanced controls, downloading, even batch processing. This architecture makes our tool the safest choice for sensitive content: passport photos, ID card scans, medical document screenshots, private family photos, and confidential work materials. No servers means no data breaches, no subpoenable records, and no privacy policy that changes tomorrow. The tool's static HTML site works offline as a Progressive Web App, so you can even save it to your home screen for completely disconnected use.
Creative Effects
Eight independent dimensions of degradation that no other free tool combines on a single page. The quality slider (1–100%) controls JPEG compression aggressiveness at the output encoding stage. The pixelation control (1×–20×) downsamples and re-upscales your image with nearest-neighbor interpolation for blocky retro grids. The noise generator (0–100%) adds per-pixel random perturbation to every RGB channel independently. The blur control (0–20) progressively downsamples the image before re-upsampling, simulating optical softness and VHS tape degradation. The brightness adjustment (−50 to +50) shifts luminance before JPEG encoding. Five one-click presets apply carefully tuned combinations: Light Fry (30% quality), Classic Deep Fried (20% quality + 2× pixelation + 15% noise + slight brightness boost), Nuked (10% quality + 8× pixelation + 35% noise + extreme brightness + yellow overlay), 2003 Phone (20% quality + 6× pixelation + 20% noise + cool blue tint), and CRT Monitor (40% quality + scan lines every 3px + dimming overlay + subtle noise). The Advanced Controls panel then lets you deviate from any preset and dial in your exact aesthetic— from subtle film grain to unrecognizable visual destruction.
Free & Unlimited
No catches, no upselling, no premium tier — not now, not ever. Process unlimited images every day with zero watermarks, zero daily caps, and zero forced registration. There is no email collection form, no sign-up modal, and no payment system anywhere in the codebase— we do not even have a Stripe account. This is sustainable because the entire tool runs client-side: we serve static HTML, CSS, and JavaScript files from a CDN (under 50KB gzipped total), and your browser does all the heavy lifting. No image is ever stored on a server, and we have zero infrastructure costs per user. This architecture lets us offer the tool completely free indefinitely without ever needing to monetize. The tool exists because intentionally ruining image quality— whether for deep fried memes, Discord compression hacks, government form photo requirements, privacy redaction, or retro CRT aesthetics— should be accessible to everyone, forever, with no strings attached.
Built for real scenarios
Whether you're making memes or shrinking files, we've got you covered.
Deep Fried Memes
Create crispy, artifact-ridden memes for Reddit's r/DeepFriedMemes (500,000+ members), Discord meme channels, Twitter, and Instagram. The deep fried aesthetic originated on Tumblr around 2014—users discovered that repeatedly screenshotting, re-uploading, and compressing an image created a uniquely grotesque visual language. Our tool replicates that entire degradation pipeline in a single click. The Nuked preset delivers the authentic “screenshotted 40 times” look with 8× pixelation, 35% noise, extreme brightness (+20), and aggressive JPEG compression at 10% quality—this is the setting used by r/DeepFriedMemes power users. The Classic Deep Fried preset gives you the standard Reddit aesthetic with 2× pixelation, 15% noise, and moderate compression at 20% quality. For subtle meme seasoning where the original image is still recognizable, start with Light Fry at 30% quality . Pro tip: combine the Nuked preset with the CRT Monitor preset afterward for a truly cursed result, or layer the 2003 Phone preset on top of Classic for a nostalgic deep fried look. The output format defaults to JPEG because JPEG's lossy compression algorithm creates the characteristic 8×8 blocking artifacts that define the deep fried aesthetic—PNG's lossless compression would defeat the purpose.
Target: 30–100KB · JPEG recommended
Discord & Forum Limits
Bypass Discord's 8MB free-tier upload cap, forum attachment restrictions, and messaging app file size limits without shrinking your image dimensions. How it works: open Advanced Controls, type your target KB in the Target File Size field, and hit Auto-Match. The tool runs a 9-iteration binary search across all 100 quality levels to find the optimal JPEG compression setting that keeps you under the limit while preserving the best possible visual quality. This is fundamentally different from resizing—your image keeps its full pixel dimensions and looks the same size on screen, but the file size drops dramatically. Common platform limits at a glance: Discord free tier: 8MB (Nitro Basic: 50MB, Nitro: 500MB). Slack: 10MB per file. Telegram: 2GB (but compresses photos automatically). WhatsApp: 16MB for media. Most online forums: 500KB–2MB per attachment. Reddit: 20MB for direct image uploads. Twitter/X: 5MB for photos. Real example: a 12MB DSLR photo of your gaming setup gets rejected by Discord's free tier. Upload it here, enter 7000 (7MB to leave headroom) in Target File Size, click Auto-Match, and the tool finds quality ~55%—keeping your photo at full 4000×3000 resolution while fitting comfortably under Discord's limit. No watermark, no registration, and the processed image never left your browser.
Target: under 100KB
Government & Exam Portals
Passport applications, visa photos, UPSC, SSC, IBPS, banking exams, driving license renewals, and other government portal uploads often impose strict dual requirements: specific pixel dimensions AND a maximum file size of 20–50KB . These two constraints are naturally in tension—keeping a photo at 300×400 pixels while squeezing it under 50KB requires aggressive JPEG compression without any resizing. The Target File Size Auto-Match mode was built exactly for this scenario. Here is the workflow: keep your photo at the exact pixel dimensions required by the form (do not resize), upload it, type your KB limit in the Target File Size field (e.g., 50 for a 50KB cap), and click Auto-Match. The tool performs a binary search across 9 quality levels—testing 50%, 25%, 12%, 6%, 3%, and so on—to find the highest quality setting that produces a file under your target. This is vastly superior to the trial-and-error approach of manually adjusting a slider, saving a file, checking its size, and repeating. Common exam photo requirements: UPSC Civil Services: 20–50KB, 3.5cm×4.5cm at 350×450px. SSC CGL: 20–50KB. IBPS: 20–50KB. NEET: 10–200KB. US passport: under 240KB at 600×600px. Indian passport: 10–20KB at 200×300px. UK passport: under 6MB. All processing runs locally in your browser, so sensitive ID documents and passport photos never touch a remote server—critical for identity documents governed by data protection laws. Output in JPEG format for maximum compression; if your form requires PNG, switch the format selector in Advanced Controls, though note that PNG files will be larger at the same visual quality.
Target: under 50KB
Retro & Vintage Aesthetics
The CRT Monitor preset layers horizontal scan lines every 3 pixels (simulating a 240-line CRT phosphor mask) with subtle RGB noise (8%) and a dimming overlay (−10 brightness) for an authentic late-1990s CRT computer monitor look. This effect is widely used in vaporwave and synthwave album art, retro gaming content, cyberpunk visual design, and nostalgia-driven brand identities. The 2003 Phone preset recreates early cameraphone photography with 6× pixelation, 20% noise, a cool blue tint applied via brightness shift, and chunky compression at 20% quality (JPEG)—think Motorola RAZR V3 (0.3MP sensor), Nokia 6600 (VGA resolution), or Sony Ericsson T610. The resulting images have the characteristic low dynamic range, crushed shadows, and color cast of early-2000s mobile phone cameras, which shot at resolutions around 640×480 with tiny sensors that produced significant noise in anything but direct sunlight. Beyond presets: creating custom retro looks. Open Advanced Controls and combine the four independent sliders to build your own vintage aesthetic. For a VHS tape effect: set pixelation to 3×, noise to 25%, blur to 3, and brightness to +5. For degraded film stock: pixelation 1×, noise 40%, blur 8, brightness −10. For early YouTube compression (2006 era): quality 15%, pixelation 1×, noise 5%, blur 1. The presets are starting points; the real creative control comes from exploring the parameter space yourself. These effects are used by musicians for lo-fi album covers, by designers for retro-themed social media campaigns, by filmmakers for period-accurate video inserts, and by artists exploring the aesthetic of digital decay as a creative medium. Download in JPEG for maximum period accuracy (matching the formats those original devices produced) or PNG if you need lossless preservation of your custom effect.
Presets: CRT Monitor · 2003 Phone
Before & after examples
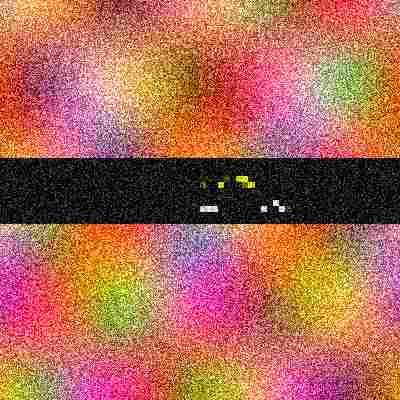
Not sure what each effect looks like? Here are real examples generated with the same engine you will use.
Original
Nuked Preset
Original
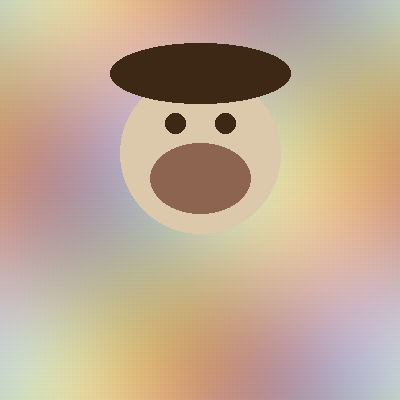
CRT Monitor
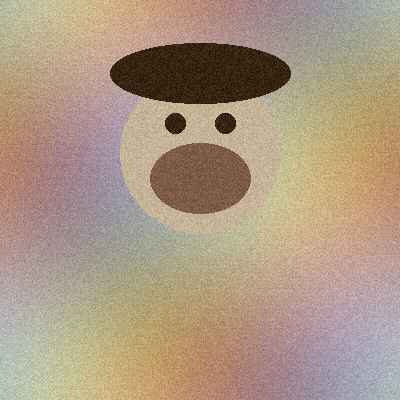
Original
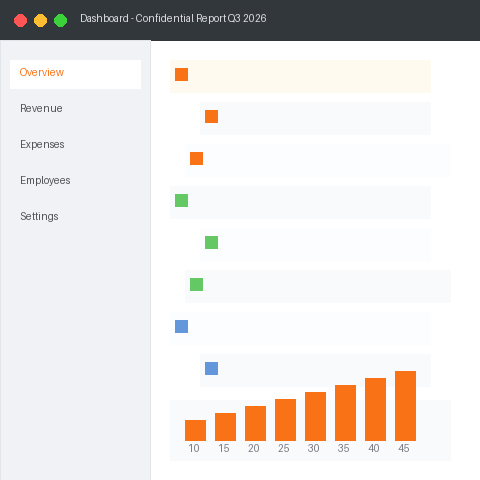
5× Pixelation
Original
2003 Phone
Deep Fried Meme Guide
The deep fried meme is internet culture’s most recognizable visual language. Originating on Tumblr around 2014 and exploding on Reddits r/DeepFriedMemes (500K+ members), the aesthetic relies on extreme JPEG compression artifacts, pixelation, oversaturation, and noise layered together to create an image that looks like it has been screenshotted, re-uploaded, and compressed dozens of times. Our tool replicates this process in a single click with three distinct frying levels, each tuned for a different stage of crustiness.
“JPEG is a commonly used method of lossy compression for digital images”—the mechanism every deep fried meme abuses.
According to Wikipedia's JPEG article
JPEG Artifacts
The signature visual of the deep fried aesthetic. JPEG compression divides your image into 8×8 pixel blocks and discards high-frequency detail within each block. At quality settings below 20%, these blocks become clearly visible as a grid of square artifacts across the image. Additional effects include ringing (halo artifacts around high-contrast edges), color banding in smooth gradients where skies and skin tones break into visible color steps, and mosquito noise around text and fine details. This is why the Nuked preset uses 10% quality—it maximizes visible block artifacts while still retaining the image’s core composition. For the authentic “re-uploaded 40 times” look, JPEG is the only format that matters.
Oversaturation
Colors blown out, brightness cranked, contrast dialed until it hurts—the visual language of excess. Deep fried memes use oversaturation as a comedic amplifier: pushing reds toward neon pink, blowing out highlights on faces, and crushing shadows into inky black blobs. In our tool, the Brightness slider (+20 in Nuked, +5 in Classic) shifts every pixel’s luminance upward before JPEG compression. Combined with low-quality encoding, this creates the characteristic “my eyes are burning” look where facial features become glowing, distorted highlights. The Nuked preset also adds a warm yellow overlay to simulate the color cast of repeated screenshotting on different color profiles. For maximum impact, pair high brightness with low quality—the JPEG encoder will aggressively quantize the already-clipped color values.
Pixel Blocks
Open Advanced Controls and crank Pixelation to 8× or higher. The pixelation algorithm works by downsampling your image to a tiny resolution (at 8×, a 2000×2000 image becomes 250×250), then re-upscaling it to the original dimensions using nearest-neighbor interpolation with imageSmoothingEnabled set to false. This creates sharp, perfectly square blocks instead of blurry interpolation. At 4× to 6×, faces become recognizable but blocky—good for standard memes. At 12× to 20×, the image becomes abstract geometric art. The Nuked preset uses 8× as the sweet spot between legibility and chaos. Combine high pixelation with JPEG artifacts for the most authentic deep fried look: the pixel blocks themselves get compressed, creating a recursive degradation that mimics real re-upload cycles.
Noise Layer
Grain layered on top for extra crust. Our noise engine uses getImageData() to access the raw pixel buffer and adds per-pixel random perturbation to every RGB channel independently. At 20–35% intensity (the Nuked and Classic ranges), the noise creates an analog static feel that makes a meme feel genuinely degraded rather than just compressed. At 50%+, the noise overwhelms the original image—useful for extreme cursed memes and abstract compositions. Unlike simple overlay approaches, our noise is computed per-channel, which means red, green, and blue values diverge independently, creating subtle color shifts that mimic the sensor noise of cheap digital cameras. The CRT preset uses low noise (8%) specifically to simulate the electron beam jitter of cathode-ray tubes. Noise also interacts with JPEG compression: random pixel variation is high-frequency detail that the JPEG encoder tries to preserve, producing a richer, more textured degradation.
Target File Size Compression
Most image compressors shrink your photo’s pixel dimensions — turning a 4000×3000 image into a tiny thumbnail. That is not what you want when a government form asks for a 300×400 photo under 50KB. Our tool keeps your exact pixel dimensions and only adjusts JPEG quality parameters. The Auto-Match feature runs a 9-iteration binary search across 100 quality levels (1% to 100%) to find the highest-quality setting that produces a file under your target KB. No trial and error, no guessing, no resizing — just type your number and click.
Open Advanced Controls → enter KB → Auto-Match
Discord’s free tier rejects uploads over 8MB with a silent failure—your image just does not appear. Our tool crushes high-res screenshots and photos under the limit while keeping full pixel dimensions. A 12MB gaming screenshot compressed at quality 55–65% typically lands around 6–7MB, giving you a comfortable margin. For Nitro Basic (50MB) or Nitro (500MB), use the Auto-Match feature with your exact target. The key advantage over resizing: your image fills the same space in chat but the file fits. Also works for Discord profile banners (6MB limit) and server icons.
Passport applications, visa photos, and exam portals (UPSC, SSC, IBPS, NEET, banking) enforce dual constraints: specific pixel dimensions AND a max file size of 20–50KB. Resizing tools break the pixel requirement; our tool keeps exact dimensions and only adjusts JPEG quality. Auto-Match enters a target like 50, runs 9 binary search iterations, and finds the optimal quality—often around 15–25%—that stays under the limit. For Indian passport photos (200×300px, 10–20KB), US passports (600×600px, under 240KB), and UK visas (900×1200px, under 6MB), the workflow is identical: upload, enter target KB, click Auto-Match, download. All processing is local, so sensitive ID photos never touch a server.
Gmail and Outlook both cap attachments at 25MB per email, and a single high-res DSLR photo (20–30MB) already exceeds that. Rather than creating a ZIP archive or uploading to a cloud drive and sharing a link, compress the photo directly: upload here, enter 20000 (20MB for multi-photo emails) in Target File Size, and Auto-Match finds the highest quality under your ceiling. The photo keeps its full 4000×3000 resolution—it just uses heavier JPEG compression. For sending 3–5 photos in one email, target 4–5MB each and they will all fit. Yahoo Mail (25MB), ProtonMail (25MB free), and iCloud Mail (20MB) have similar limits. For truly massive batches, use the batch processing feature to compress a whole folder at once with identical settings.
Pixelation for Privacy & Style
Adjustable pixelation from subtle 2× to total-abstraction 20×, controlled by a single slider in Advanced Controls. The pixelation algorithm works by downsampling your image to a fraction of its original resolution using nearest-neighbor interpolation (imageSmoothingEnabled = false), then re-upscaling it to the original dimensions. This creates sharp, perfectly square blocks rather than the blurry result you would get from bilinear or bicubic scaling. Crucially, the pixelation is baked into the downloaded image data —it is not a CSS overlay or a viewport trick. Once you download the pixelated image, the effect is irreversible and permanent, making it ideal for privacy redaction where you need guaranteed, forensic-level censorship that cannot be undone by inspecting the page source or removing a CSS filter.
Advanced Controls → Pixelation slider
Censor Sensitive Info
Blur faces, license plates, addresses, credit card numbers, and personal data before sharing screenshots publicly. Unlike screenshot annotation apps that draw a colored rectangle over sensitive areas (which can sometimes be removed or seen through by adjusting contrast), our pixelation rewrites the actual pixel data at the image buffer level. At 8× pixelation, a face becomes a grid of 60–80 colored blocks with zero recoverable detail—forensically irreversible. Recommended settings: 6× for faces, 4× for text and numbers, 10× for license plates and ID numbers. Download as PNG to preserve the sharp block edges without JPEG compression artifacts that could soften the censorship.
8-Bit / Pixel Art
Transform any photo into pixel art without specialized software. According to Wikipedia's Pixel art article , the medium comprises images “built using pixels as the only building block.” At 4× pixelation, a 2000×2000 image becomes a 500×500 grid of colored blocks—comparable to a Nintendo DS screen. At 6× (333×333 effective blocks), you get the classic Super Nintendo / Sega Genesis sprite resolution. At 12×, the image becomes an abstract mosaic of 166×166 blocks—perfect for album art backgrounds and modern pixel-art interpretations. Pro tip: download as PNG to preserve the hard pixel edges. JPEG compression will blur the block boundaries slightly, which ruins the effect. For maximum retro authenticity, combine 6× pixelation with the 2003 Phone preset to get pixel art with period-appropriate color casts and noise.
Meme Ingredient
Pixelation is one of three core degradation dimensions in every deep fried meme, alongside JPEG compression and noise. The Nuked preset combines all three at aggressive levels: 8× pixelation + 35% noise + 10% JPEG quality. But you can customize: reduce pixelation to 2× for a meme where the subject is still recognizable, or push it to 12× for abstract absurdist memes where the original content is barely discernible. The interaction effect matters most: pixelation creates large blocks, JPEG compression then artifacts those blocks with 8×8 grids, and noise adds per-pixel randomness on top. This three-layer degradation mimics the authentic “re-uploaded 40 times” process better than any single effect alone. The Classic Deep Fried preset uses 2× pixelation as a subtle base, while Nuked at 8× makes it the dominant visual feature.
Vintage Phone Look
The 2003 Phone preset combines 6× pixelation, 20% noise, and a cool blue tint to recreate early cameraphone photography—Motorola RAZR V3 (0.3MP, fixed focus), Nokia 6600 (VGA, no autofocus), Sony Ericsson T610 (CIF resolution). These phones produced images with distinct visual signatures: low pixel count (640×480 or smaller), aggressive JPEG compression to fit in tiny internal storage, heavy chroma noise in low light, and a blue/cool color cast from early CMOS sensors. Our preset replicates all three simultaneously. Customizing the look: reduce pixelation to 3× for a 2010-era BlackBerry or early iPhone 3G aesthetic. Increase noise to 40% for a “shot in a dark club” vibe. Add blur (3–5) for the soft-focus look of fixed-focus lenses on subjects closer than 1 meter. Download as JPEG at 20% quality to match the aggressive compression those phones applied to fit photos in 1–2MB of total storage.
Best settings for every scenario
Not sure what settings to use? Here is a quick reference guide with recommended configurations for the most common use cases.
| What you want | Format |
|---|---|
| Maximum crust deep fried meme Reddit r/DeepFriedMemes, extreme irony | JPEG |
| Standard Reddit meme Visible artifacts, not total destruction | JPEG |
| Discord upload (under 8MB) Bypass free-tier upload cap | JPEG |
| Government form photo (under 50KB) Passport, visa, UPSC, SSC, IBPS | JPEG |
| Censor faces / sensitive text Permanent privacy masking | PNG |
| 8-bit pixel art aesthetic Retro game look, creative projects | PNG |
| CRT monitor nostalgia 90s computing, vaporwave, synthwave | JPEG |
| 2003 cameraphone look Motorola RAZR, Nokia 6600 nostalgia | JPEG |
Pro tip: Start with a preset, then open Advanced Controls to see exactly which parameters it set. Tweak from there to build your own custom style.
Retro & Vintage Effects
Low quality is not just about compression — it is a visual language with distinct dialects. CRT Monitor: horizontal black scan lines every 3px with subtle noise and a slight brightness reduction, recreating the phosphor glow of a 1990s CRT display. 2003 Flip Phone: 6× pixelation with a cool blue tint and chunky noise, evoking the VGA camera sensors of early-2000s mobile phones like the Motorola RAZR and Nokia 6600. Custom combinations: use the Advanced Controls to layer any mix of effects — try 4× pixelation + 20% noise + CRT scan lines for a corrupted 90s broadcast look. All effects run locally; none of your images are uploaded.
Presets: CRT Monitor · 2003 Phone · Custom combos
CRT Monitor
Horizontal scan lines every 3px, subtle noise, slight dimming. Captures the phosphor glow of a CRT screen.
2003 Flip Phone
Low resolution, cool blue tint, chunky noise. The exact look of a photo taken on a Motorola RAZR.
VHS Color Bleed
Slight color shift, analog warmth, reduced sharpness. Like a tape that's been played one too many times.
GIF Degradation
Upload animated GIFs and apply all the same effects. Great for deep fried reaction GIFs. Full frame-by-frame support ready now.
How to use the low quality image maker
From upload to download in under 30 seconds. No software, no signup, no server uploads — everything happens inside your browser at native speed.
Upload Your Image
Click the upload zone or drag and drop any image file directly from your desktop or file explorer. The tool accepts JPEG, PNG, WebP, GIF, and BMP files up to 100MB each. Need to process multiple images? Select several files at once (hold Ctrl or Cmd while clicking) or drag a group — the batch processor handles them all with the same settings. Your file never leaves your device : the browser reads it directly into memory using the FileReader API. No network request is made.
Choose Your Degradation Method
You have four ways to control the output, depending on how much precision you need:
Drag from 1% (maximum compression, smallest file) to 100% (near-original). The file size updates in real time below the preview. Ideal for quick compression when you do not need an exact target.
Five pre-configured styles: Light Fry, Classic Deep Fried, Nuked, 2003 Phone, CRT Monitor. Each preset sets the quality slider and all four advanced parameters to curated values. Click a preset, see the sliders update, then tweak anything further.
Expand the Advanced panel for four independent sliders: Pixelation (1×–20×), Noise (0–100%), Blur (0–20), and Brightness (−50 to +50). Combine them freely for custom effects unavailable in any other free tool.
Type your target KB (e.g. 50 for 50KB), click Auto-Match. The tool runs a 9-iteration binary search across quality levels 1–100 to find the optimal setting. Perfect for government forms, Discord limits, and email caps.
Download or Copy
When you are satisfied with the preview, click Download to save the degraded image to your device. Choose your output format (JPEG, PNG, or WebP) from the Advanced Controls panel before downloading. The file name includes a timestamp so you will not overwrite your original. Use the Copy button to place the processed image directly on your clipboard — paste it instantly into Discord, Slack, Twitter, or any app that accepts pasted images. No watermarks, no registration, no usage limits. Process another image immediately — there is no cooldown, no daily cap, and no queue.
Works with any image type
The same client-side Canvas engine adapts every preset to your content. Memes, portraits, screenshots, landscape photos, logos, and product shots all degrade authentically. See real before-and-after examples in the gallery above, or drag an image into the tool below.
How the degradation engine works
Understanding what happens under the hood helps you get the exact results you want. Every effect runs in a specific order for the most natural degradation.
Pixelation (Resolution Reduction)
The image is drawn at a reduced resolution (original width divided by pixelation factor), then scaled back up with image smoothing disabled . At 8x, the image is rendered at 1/8th size then blown up, creating sharp pixel blocks. This is the foundation of the deep fried look and the most effective way to obscure faces and text for privacy. Unlike CSS-based blur overlays that can be bypassed, our pixelation rewrites the actual image data - the effect is baked into the downloaded file and cannot be reversed.
Blur (Downscale-Upscale Softening)
Rather than using a Gaussian convolution kernel, blur is achieved by drawing the image at a reduced scale then stretching it back . At blur level 10, the image is rendered at approximately 50% of its original size, then expanded to fill the full canvas. Higher blur values use progressively smaller intermediate canvases for stronger softening. The result is similar to a box blur - edges soften, fine details merge, and the image takes on a dreamy, unfocused quality.
Noise (Per-Pixel Random Perturbation)
Every pixel's RGB values are offset by a random amount within the noise intensity range . At 35% noise (the Nuked preset level), each color channel fluctuates by up to plus or minus 89 units. At low levels (5-10%), noise adds subtle film grain. At high levels (30-50%), it creates aggressive analog static reminiscent of a detuned CRT television or a heavily compressed digital video feed.
Brightness (Linear Channel Shift)
Each pixel's RGB values are shifted by a fixed amount: positive values brighten, negative values darken. At +20 brightness (Nuked preset), every channel increases by approximately 51 units in the 0-255 range. At -10 (CRT preset), every channel decreases by about 25 units. This is a linear shift , not a gamma correction - highlights clip more aggressively into pure white and shadows crush into pure black, producing the look of an overexposed or underexposed photograph.
JPEG Compression (Quality Encoding)
The final canvas is exported via
canvas.toBlob() at the specified quality level (1-100). The encoder applies the
JPEG standard's 8-by-8 block-based Discrete Cosine Transform compression
, which is the source of the characteristic blocky artifacts, color banding, and mosquito noise around sharp edges. At 10% quality, the compression is extremely aggressive - each 8x8 block is heavily quantized, producing the classic deep fried artifact pattern. PNG output skips this step entirely (lossless). WebP uses its own predictive coding algorithm with similar quality scaling but better efficiency at low bitrates.
Preset-Specific Effects (Overlay Layer)
After the five-step pipeline, presets apply additional effects as a final overlay: Nuked adds a warm yellow overlay at 30% opacity for the blown-out look. CRT Monitor draws 1px black horizontal lines every 3px to simulate phosphor scan lines. 2003 Phone applies a cool blue tint at 10% opacity. These overlays are themselves affected by the JPEG compression step - the scan lines and tints acquire compression artifacts just like the rest of the image, adding to the authenticity of the effect.
All steps execute synchronously via the Canvas 2D API. According to MDN, the Canvas API is “a means for drawing graphics via JavaScript and the HTML <canvas> element.” A typical 12-megapixel photograph processes in under 50 milliseconds on modern hardware. The Target File Size Auto-Match mode runs this entire pipeline up to 9 times with different quality values, using binary search to converge on the optimal setting.
Frequently asked questions
How do I make an image lower quality online?
Step 1: Drag and drop any image (JPEG, PNG, WebP, GIF, or BMP) into the upload zone above. Step 2: Use the quality slider to set your desired degradation level — lower percentages mean more compression and smaller file sizes. You will see the file size change in real time in the preview panel. Step 3: Optionally click a preset button like Nuked for deep fried memes or CRT Monitor for retro effects. Step 4: Open Advanced Controls for fine-grained adjustments to pixelation, noise, blur, and brightness. Step 5: Click Download when satisfied. No watermarks, no registration, no limits.
Is this tool safe and private?
100% yes, and here is why: All image processing runs entirely inside your web browser using the HTML5 Canvas API. Your files are never transmitted to any remote server. No data leaves your device at any point during upload, processing, or download. You can verify this yourself — open your browser’s Developer Tools Network tab while using the tool and you will see zero network requests during processing. You can even disconnect your internet connection entirely and the tool continues to work. We do not use cookies, analytics trackers, or any form of data collection. This makes the tool particularly suitable for sensitive documents like passport photos, ID cards, medical images, or any private photograph you would not want uploaded to a third-party server.
What image formats are supported?
Input formats: JPEG (.jpg, .jpeg), PNG (.png), WebP (.webp), GIF (.gif), and BMP (.bmp). Maximum input file size is 100MB per file. You can upload multiple files simultaneously for batch processing. Output formats: JPEG (best for deep fried effects and maximum compression), PNG (lossless, preserves transparency, larger files), or WebP (modern balance of quality and size). Select your output format from the Advanced Controls panel. For deep fried memes and compression, JPEG at 10–30% quality is recommended. For pixel art and privacy masking, PNG preserves sharp pixel edges. For general use, WebP offers the best quality-to-size ratio.
Can I make deep fried memes with this?
Absolutely — this tool is built for it. Nuked preset: applies 8× pixelation, 35% noise, over-brightening, and 10% JPEG quality for the maximum “screenshotted 40 times” look. Classic Deep Fried: 2× pixelation, 15% noise, slight brightening at 20% quality — the standard Reddit r/DeepFriedMemes aesthetic. Light Fry: subtle JPEG compression at 30% quality, recognizable but degraded. Each preset also updates the Advanced Controls sliders so you can see exactly what parameters are being applied and tweak them further. The processing happens entirely in your browser, so no one can see your cursed creations until you choose to share them.
How much can I reduce the file size?
You can reduce image quality down to 1%, often reducing file size by over 95% . For example, a typical 4MB smartphone photo becomes approximately 30–50KB at 5% quality while keeping the same pixel dimensions. At 1% quality, that same photo can shrink to under 10KB. For precise file size targeting, use the Target File Size Auto-Match feature in Advanced Controls: enter your desired KB (e.g., 50 for a government form photo requirement), and the tool performs a binary search across 9 quality levels to find the optimal setting that stays under your target while preserving the best possible visual quality. This is especially useful for Discord’s 8MB limit, email’s 25MB cap, and government portal requirements of 20–50KB.
Does it work on iPhone and Android?
Yes. The tool is fully responsive and works in all modern mobile browsers including Safari on iOS, Chrome on Android, Firefox, and Edge. No app download is required — simply open this page on your phone, tap the upload zone to select a photo from your camera roll, adjust the quality slider, and download. All processing happens on-device using your phone’s GPU-accelerated browser engine. The interface automatically adapts: on desktop, the upload and preview panels sit side by side; on mobile, they stack vertically for comfortable thumb navigation. All touch targets meet the 44×44px minimum for accessibility.
Is this really free?
100% free with absolutely no strings attached. There are no daily usage limits, no watermarks on downloaded images, no forced registration, and no premium tier to upsell you to. We do not even have a payment system. Process as many images as you want, every day, forever. The tool operates entirely in your browser, which means our hosting costs are minimal — we only serve static HTML, CSS, and JavaScript files. There is no server-side processing to pay for, no image storage to maintain, and no user database to manage. This architecture lets us offer the tool completely free indefinitely without ever needing to monetize.
Why do people intentionally make images low quality?
Intentional image degradation serves several distinct purposes. Internet culture and humor: Deep fried memes use extreme JPEG compression, pixelation, and oversaturation as a form of irony and absurdist comedy. The aesthetic originated on Tumblr around 2014–2015 and grew into a major format on Reddit (r/DeepFriedMemes has over 500,000 members), Discord, and Twitter. Practical file compression: Many platforms enforce strict file size limits — Discord’s free tier caps at 8MB, Gmail at 25MB, and government portals often require photos under 50KB. Privacy and censorship: Pixelation is the standard method for obscuring faces, license plates, addresses, and other sensitive information in images shared publicly. Aesthetic and nostalgia: CRT scan lines, VHS color bleed, and early-2000s cameraphone grain evoke specific eras of digital culture, used in music videos, album art, and brand identities.
Why keep original dimensions but make it look worse?
Most image compressors and resizers shrink the pixel dimensions of your image — turning a large photo into a physically smaller one on screen. Our tool takes a different approach: it keeps the exact same width and height in pixels while applying heavier JPEG compression. This means your image fills the same space on screen but looks softer, blockier, and more artifacted. This is the correct approach for deep fried memes (where large visible pixel blocks are the goal), for government form photos (where specific pixel dimensions are required), and for any scenario where you want the image to look worse without getting smaller.
What's the difference between reducing quality and reducing resolution?
Resolution reduction (resizing) changes the number of pixels in your image — for example, shrinking a 4000×3000 photo to 800×600. The image becomes physically smaller on screen and contains less pixel data, which reduces file size but also makes details harder to see. Quality reduction keeps the exact same pixel count but applies heavier JPEG compression. The image fills the same space on screen but shows more compression artifacts — blocky 8×8 pixel squares, color banding, ringing around edges. Our tool focuses on quality reduction because it produces the characteristic degraded look that resolution reduction cannot: the image stays large but looks terrible. For maximum file size reduction, combine both: use the pixelation slider (which effectively reduces detail) plus a low quality setting.
How does this compare to other tools?
Most online low-quality image tools offer only a single quality slider with no additional controls, presets, or guidance. Here is what sets our tool apart: Five one-click presets (Light Fry, Classic Deep Fried, Nuked, 2003 Phone, CRT Monitor) that apply carefully tuned combinations of multiple effects. Target File Size Auto-Match — type any KB target and the tool finds the optimal quality setting via binary search (no other free tool offers this). Four independent parameter sliders (pixelation, noise, blur, brightness) for precise creative control. Batch processing with individual download buttons. 100% client-side processing — verified privacy with zero network requests. 100MB file limit (most competitors cap at 5–10MB). No watermarks , no registration, no usage limits, and completely free with no paid tier.
Can I process multiple images at once?
Yes. Select multiple files in your file picker dialog (hold Ctrl or Cmd while clicking), or drag and drop a group of images onto the upload zone. All images are processed simultaneously with the same quality settings, preset, and advanced parameters . The primary preview shows the first image, and a Batch Results panel appears below the controls showing thumbnail cards for each additional image with individual file size stats and download buttons . There is no limit to how many images you can process, either in a single batch or across sessions. The Download All button triggers sequential downloads for every image in the batch with a 300ms delay between each to avoid browser popup blocking.
What is the maximum file size I can upload?
Up to 100MB per file with no practical limits on image dimensions. This is significantly larger than most competing tools, which typically cap at 5–10MB. A 100MB file at modern smartphone resolution (e.g., 12MP or 4000×3000) takes under 200ms to process on current hardware. There is no limit on the number of files you can process per session or per day — batch upload as many as you want. If you need to process files larger than 100MB, we recommend using desktop image editing software like GIMP or Photoshop for the initial resize, then returning here for the quality degradation pass.
Can I use this tool offline?
Yes. Because 100% of the image processing runs inside your browser using the Canvas API, you can load the page once (or save it to your device), disconnect from the internet, and continue using every feature: uploading, quality adjustment, preset effects, advanced controls, batch processing, and downloading. The tool is built as static HTML, CSS, and JavaScript with zero server dependencies. For the best offline experience, save this page to your home screen on mobile (via your browser’s “Add to Home Screen” option) or bookmark it on desktop. The page will load from cache when you are offline and work identically to the online version. This also means the tool works on airplanes, in areas with poor connectivity, and in secure environments where internet access is restricted.
Does the tool support animated GIFs?
Yes — with full animation preservation in the preview. When you upload an animated GIF, the tool uses gifuct-js to decompress every frame, then renders them sequentially in the preview panel with the current quality and effect settings applied to each frame in real time. You see the animated result with all effects (pixelation, noise, blur, brightness) applied while the GIF plays. Note on downloading: the current version outputs individual frames as JPEG for maximum compression. Full animated GIF export with all effects baked in is under development. For now, the preview accurately shows how each frame of your GIF will look with the degradation applied, and you can download any individual frame as a JPEG. This is the only free online image degradation tool that provides animated GIF preview with live effects applied — most either reject GIFs entirely or only process the first frame.
What output formats can I download?
Advanced Controls includes a format selector with three output options: JPEG (default, best for deep fried memes and maximum compression — uses lossy compression to create characteristic artifacts), PNG (lossless, best for privacy redaction and pixel art where you want clean pixel blocks without additional compression artifacts), and WebP (modern format offering better compression than JPEG at equivalent quality, but with less pronounced artifacts for the deep fried aesthetic). The quality slider affects JPEG and WebP output directly; PNG output ignores the quality setting since PNG uses lossless compression. Choose JPEG for memes, Discord compression, and government forms. Choose PNG for pixelation-based privacy masking and 8-bit art where you want clean, sharp pixel edges. Choose WebP when you need the smallest possible file size at reasonable quality for web use.
How does the Target File Size Auto-Match work?
The Auto-Match feature in Advanced Controls uses a 9-iteration binary search algorithm to find the optimal JPEG quality setting for your target file size. Here is how it works: you enter a target KB value (e.g., 50 for a 50KB limit), click Auto-Match, and the tool starts testing quality levels. It begins at 50%, checks the output size, and then narrows the search range based on whether the result is above or below your target. After 9 iterations it converges on the highest quality setting that produces a file under your target KB. This is much faster than manually adjusting the slider and checking file sizes — a process that would take 20–30 trial-and-error attempts for the same precision. Important: Auto-Match only adjusts the quality slider; it does not change your pixelation, noise, blur, or brightness settings. If you have aggressive effects enabled (like 8× pixelation), those effects are applied before quality compression, which affects the final file size. For the most accurate targeting, start with effects at their minimum and run Auto-Match, then add creative effects afterward.
Is there a way to undo or reset my changes?
Yes — the Reset button (next to Download and Copy) clears the current image and resets all parameters to their defaults: quality to 15%, pixelation to 1×, noise to 0%, blur to 0, brightness to 0, and output format to JPEG. This does not undo individual parameter changes incrementally; it performs a full clean-slate reset. Workflow tip: if you are experimenting with different effect combinations and want to compare them, download each version before changing settings. Since the tool generates new files each time (no overwriting), you can build up a collection of variants on your device and pick your favorite. The live preview always reflects the current slider and preset values, so you can freely explore the parameter space without worrying about permanently ruining anything — just hit Reset and start over.
How we compare
A side-by-side look at what sets this tool apart from other free online image degraders.
| Feature | This Tool | Other Free Tools |
|---|---|---|
| Quality slider with live preview | ✓ | ✓ |
| One-click presets (Meme, CRT, Vintage) | 5 styles | None |
| Target file size auto-match (binary search) | ✓ | ✗ |
| Advanced effects (noise, blur, brightness, pixelation) | 4 sliders | 0–2 sliders |
| Batch processing (upload multiple files at once) | ✓ | ✗ |
| GIF animation support with live preview | ✓ | Rare (1 site) |
| Max file size | 100 MB | 5–10 MB typical |
| Output formats | JPEG + PNG + WebP | JPEG only (most) |
| Processing location | Browser (100% private) | Browser (most) |
| Sample images to try instantly | ✓ | Rare |
| Registration required | None | Often required |
| Mobile responsive / touch optimized | ✓ | Partial (2-3 sites) |
| Educational content & guides | Built into page | Rare (1 site has blog) |
| Watermarks | Never | No (most free tools) |
Based on publicly available feature lists of free online image degradation tools as of 2026, including lowqualityimage.net, lowqualityimage.com, baixarqualidadeimagem.com.br, minipx.com, and lowqualitymemes.com. Our tool is the only one that combines all five presets, target file size auto-match, batch processing, and full offline capability in a single page — with no registration, no watermarks, and no file size limits below 100MB.
This table is for informational purposes. Individual experiences may vary.
Ready to make your images look terrible?
No signup. No watermarks. No server uploads. Just drag an image into the upload zone above and start degrading. Everything happens in your browser — your files never leave your device.